Re-use Beer bottles

Few week back was my 28th birthday… m getting old #snob #snob. We had a small party at home, small for the count of people but a big one when i counted empty beer bottles. My husband was about to throw it in trash, but than i thought of doing some diy craft with them too.

f6fe7ec387505063983dbaec737c582d (1)

I played with two kind of ways to color those bottles – painting the outer of the bottle with brush and paint and other one works from inside. Now lets note down

Item Required


– Empty bottle ( beer, wine, vodka.. even mason jar)

– Acrylic Paints 

– Brush

– Old Newspaper

20140423_215611

Procedure ONE

Let me first explain the procedure for first way of painting the bottle, which was not that amazing as later after drying it has some roughness on the bottle which does not impressed me a lot. It’s simple as painting any other thing in this world, choose the color of your choice and with the help of the brush start applying it on the outer sides of the bottle. 

First, a thin coat and after it dries apply 2nd or 3rd coat as per required. Let it dry over night, next morning you can draw something pretty like me, i did small polka dots pattern with orange shade looks good on the green bottle.

Procedure TWO

Its my favorite, it just bring those blank bottle in life, so colorful, shining and smooth. And believe me its simplest than the above procedure. You just need to pour some Acrylic paint inside the bottle and than start revolving the bottle and spread the color inside it so that it will cover all the empty space.

Once done, just keep it upside down so as the excess color will come out and the rest inside the bottle get dry.

You can use these colored bottles as show piece, or as flower pot, choice is yours.

Note – Cover you work place with old newspaper while coloring the bottles to keep the space clean and safe.

P.s – i am adding few more ideas for color combination and use of color bottles.

DSC_2102

wine_bottles

botellas pintadas 3  

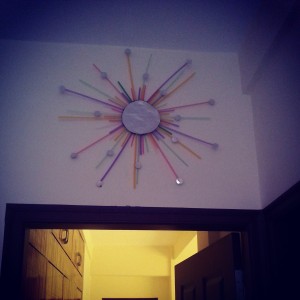
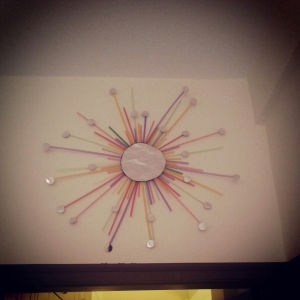
Colorful Sun Burst

Sun Burst… yes, i have done a diy project last weekend, its actually a fake sun burst as i did not used real mirror to make it. Never mind…  the main point is i enjoyed making it and it gives an amazing lift to one of a lonely wall of my living room.

IMG_20140426_104241

Item Required

– Colorful Straws

– Card board

– Silver handmade sheet

– Glue

– Xacto knife/cutter

Procedure

The very first step to create a sun burst .. we need a card board cut out in a circular shape. The radius of the circle depends on your choice… How big you want your sun burst to look. Trace the circle shape on the cardboard and cut it with the help of your cutter.

After you have your circular cut out, arrange the straws around it and get an idea where you want what color of straw, how you want them to arrange. Once the template is done. Start gluing  all the straws on the cardboard one by on in the manner they were arrange on that piece of cardboard.

Make sure we have arrange the straws in the zig-zag manner so that it will cover the whole cardboard properly. you can design it with some big and some small piece of straws as i did.

Let them dry properly. Now cut the silver handmade sheet of the 1/2 inch bigger than the circular cardboard and than paste it parallel to the cardboard above the pasted straws. Remember the straws arrangement is in between cardboard and the silver sheet.

i know after doing all this its still looks a bit dull. Right???

 Lets decorate it further, cut small small circle pieces from the silver sheet and paste them randomly on the straws.

Voila!!… the colorfull and shining sun-burst from your home is done.

wpid-img_20140501_151446.jpg

p.s – mail me your diy projects will try to cover them on my blog.

#staycrafty