Re-use Beer bottles

Few week back was my 28th birthday… m getting old #snob #snob. We had a small party at home, small for the count of people but a big one when i counted empty beer bottles. My husband was about to throw it in trash, but than i thought of doing some diy craft with them too.

f6fe7ec387505063983dbaec737c582d (1)

I played with two kind of ways to color those bottles – painting the outer of the bottle with brush and paint and other one works from inside. Now lets note down

Item Required


– Empty bottle ( beer, wine, vodka.. even mason jar)

– Acrylic Paints 

– Brush

– Old Newspaper

20140423_215611

Procedure ONE

Let me first explain the procedure for first way of painting the bottle, which was not that amazing as later after drying it has some roughness on the bottle which does not impressed me a lot. It’s simple as painting any other thing in this world, choose the color of your choice and with the help of the brush start applying it on the outer sides of the bottle. 

First, a thin coat and after it dries apply 2nd or 3rd coat as per required. Let it dry over night, next morning you can draw something pretty like me, i did small polka dots pattern with orange shade looks good on the green bottle.

Procedure TWO

Its my favorite, it just bring those blank bottle in life, so colorful, shining and smooth. And believe me its simplest than the above procedure. You just need to pour some Acrylic paint inside the bottle and than start revolving the bottle and spread the color inside it so that it will cover all the empty space.

Once done, just keep it upside down so as the excess color will come out and the rest inside the bottle get dry.

You can use these colored bottles as show piece, or as flower pot, choice is yours.

Note – Cover you work place with old newspaper while coloring the bottles to keep the space clean and safe.

P.s – i am adding few more ideas for color combination and use of color bottles.

DSC_2102

wine_bottles

botellas pintadas 3  

Colorful Sun Burst

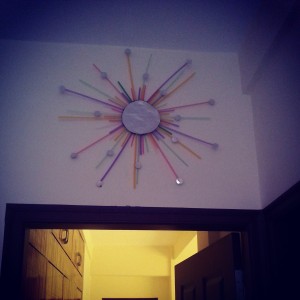
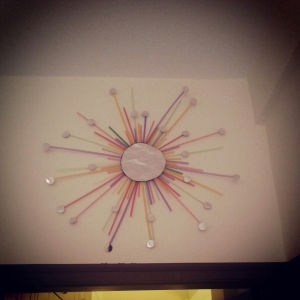
Sun Burst… yes, i have done a diy project last weekend, its actually a fake sun burst as i did not used real mirror to make it. Never mind…  the main point is i enjoyed making it and it gives an amazing lift to one of a lonely wall of my living room.

IMG_20140426_104241

Item Required

– Colorful Straws

– Card board

– Silver handmade sheet

– Glue

– Xacto knife/cutter

Procedure

The very first step to create a sun burst .. we need a card board cut out in a circular shape. The radius of the circle depends on your choice… How big you want your sun burst to look. Trace the circle shape on the cardboard and cut it with the help of your cutter.

After you have your circular cut out, arrange the straws around it and get an idea where you want what color of straw, how you want them to arrange. Once the template is done. Start gluing  all the straws on the cardboard one by on in the manner they were arrange on that piece of cardboard.

Make sure we have arrange the straws in the zig-zag manner so that it will cover the whole cardboard properly. you can design it with some big and some small piece of straws as i did.

Let them dry properly. Now cut the silver handmade sheet of the 1/2 inch bigger than the circular cardboard and than paste it parallel to the cardboard above the pasted straws. Remember the straws arrangement is in between cardboard and the silver sheet.

i know after doing all this its still looks a bit dull. Right???

 Lets decorate it further, cut small small circle pieces from the silver sheet and paste them randomly on the straws.

Voila!!… the colorfull and shining sun-burst from your home is done.

wpid-img_20140501_151446.jpg

p.s – mail me your diy projects will try to cover them on my blog.

#staycrafty


Re-use and craft magic

As i have told you all before that we just moved in a new house, so my house is full of  empty cardboard boxes, so thought of using them as a small side table for keeping some knicks ‘n’ knacks. 

IMG_20140426_104156

I made this super cute side table for keeping a photo frame and some colorful bottles.

Secret its my  food processor box 😛

Item Required

– Empty cardboard box

– Few handmade sheets

– Mod-podge

– Washi tapes

– Form paint brush

(to apply mod-podge)

Procedure

Clean the cardboard box with a damp cloth so there would be no dust, take our any trace of duck tape or something. Once done, place it the way you want to keep it in your room, horizontal or vertical as per the height and width of the box you are using.

Now cut the handmade sheet as per the size of the box side, in total you need 6 sheet cut out, i used only 4 as i did not decorate the back and the bottom of the box, as its not gonna be visible. SAVE PAPER 🙂

Once you got all the cut-outs,. start pasting them on side of your box one by one with the help of mod-podge. I just love the way mod-podge works… its amazing. After pasting all the side, you can see the edges are bit rough and untidy to hide that.. use washi tapes of your choice which ever goes best with the color of your sheet. 

I used some of the multicolored as the sheet i use is grey and it gives a nice background to the color of washi tapes. they really came well together.

Once everything is done to the box perfectly add a layer of mod-podge to keep it safe and this layer will give a nice smoothness and shone to the box.

IMG_20140425_221651


Enjoy the read and let me know if you try this. #staycrafty

Bring colors to your Room….

I was thinking to make a headboard for my bed.. but was not able to finalize anything in particular. One day i came across this following piece of art, which was way to simple to create and very elegant and colorful.  I instantly fall in love with that . The time i saw that on pinterest i knew that it will  bring a colorful grace in our bedroom.

diy-canvas-art

Isn’t it Pretty ?? 

And it goes so amazingly well with the flowers at its side on the table.

I decided to make it but in different color combination, so it will go well with the curtains of my bedroom. So, I chose shades of Yellow and Orange. 

Item Required

– Different size of canvas

(you can use more shapes also if you like any example circle and oval,

I took quite similar to the above picture square and rectangle)

–  Acrylic colors

(shades of your choice, always remember it’s your work and your house Go creative)

– Flat Brush

– Nails 

– Painter tapes/ Masking tapes

Untitled

Procedure

First lay all the canvases on the floor and arrange them in the way you want them to be on your wall and then visualize which color should go on which piece of canvas. Try not to keep to almost same shade of color side by side .. otherwise it will lose it’s charm. Try arranging darker canvas with the lighter ones.

Once your done deciding this basic requirements of arrangement and color coordination. Now, if you do not want to paint the canvas sides than firstly secure them with tapes and than start painting your canvas. Try putting a thin coat first and let all of them dry for couple of hours  ( Acrylic color won’t take much time to dry). If later you feel like the are very light, than paint them again with one more coat of paints.

Let them dry overnight.

Next day, take out the tape from the sides of canvas and  arrange them on your wall as you previously decided with the help of nails. If you want you can even frame them and than put them on the wall, its all your choice . I did them with out frames.

IMG_20140331_224037


Zebra print Key Holder

Everyday my husband and me get late for our office because we are not able to find keys of our home… Why??? Because there is no specific space for that Key, sometimes its on couch, somewhere in the drawers and sometimes just laying on the floor.

So I being the responsible one, started searching for a stylish and trendy key holder, but was not able to find any. Yesterday after dinner we were watching some movie and it suddenly struck  me that i have the stick on hooks which i can use to make a  key older at home. So here i am 🙂 

IMG_20140420_231850

Item Required

– Hooks

– Washi tapes

–  2 cardboard piece ( Size depends on the number of hooks you want in it)

– Scissor

–  Glue

Procedure

 Firstly make a trial run of how you want your key holder to look. Start placing one cardboard on your working table and than place the hooks over them and them add the other sheet of cardboard. This way you will get the look and feel of your final product.


20140420_200524

Once you are finalize the look than sticking all of them together with the help of glue. First stick the hooks on the first sheet of cardboard and press it hard and than top it with other sheet of cardboard. After finishing you can only see the main hooks and the top cardboard and rest everything else of the hooks are hide between the card boards.

20140420_200519

Keep it resting for sometime so that everything get dry and won’t come out when are giving it the finishing touch.

Take your favorite washi tapes and start pasting them on your cardboard. I used Zebra printed, you can go creative and can use different pattern or colors of washi tapes. One can paint the cardboard and make a design over it or you can write something over it with colors.

Once you done stick it on walls with the help of nails or you can use double sided tape if your keys are not too heavy.

IMG_20140420_231815

and then never loose your keys in your house.

ps. Mail me your creation on nidhisharmakorpal@gmail.com and ask me queries if you have any.

#staycrafty

Colorful Wall Art … from Old Magazine Paper

10156090_1474772649406043_995881838_n

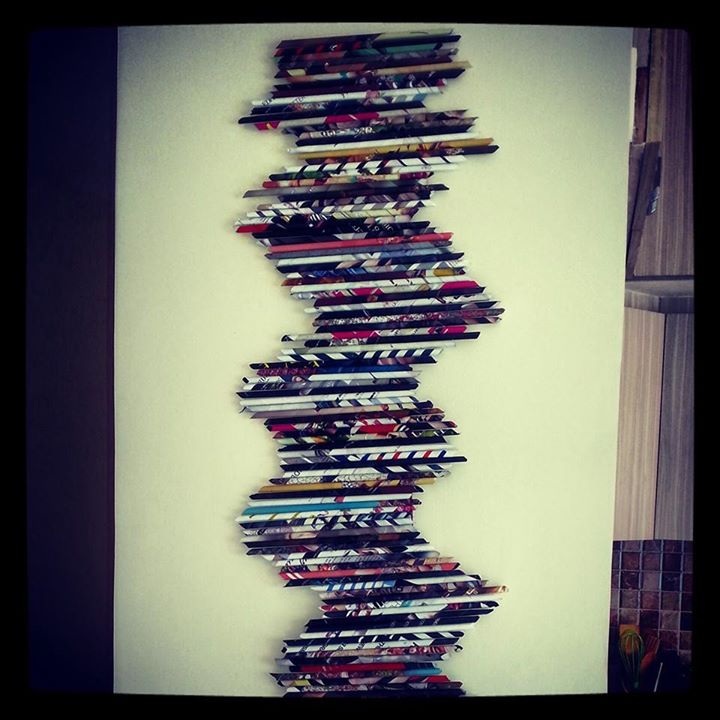
I have this small wall in between my living room and kitchen, which looks very blank and lonely to me. So to spice up this space i made this wall art… isn’t it beautiful.

Item Required 

–  Old Magazine (prefer a glossy and colorful one)

– Glue,Scissor  and Nails  (to hang it on wall)

– Skewer or long pencil will also do

-Old Cereal box

Procedure

Lets first start  with tearing the colorful page from the magazine as we have to make the rolls out of it. How to make a perfect tight roll from the pages. Take a sheet from the magazine and start rolling it from the corner with the help of skewer /pencil.

FPP9XJZF3PIEOOF.MEDIUM

Make sure you make a nice tight roll and glue the end of the paper so that the roll won’t get open up. 

imag0544

It will look like the above picture .

Now the question is how many rolls we need, believe me there is no count of these pretty babies because  the more rolls you have the more bigger will be your wall art. So it just depend on your choice how big you want it.

20140405_123933

Once you are done making all magazine rolls, take out your cereal box and start cutting the side parts of it  that is from one corner to other. Confused ..???? No picture with me for the same.. never mind i will start explaining take the cereal box and start from the left side of it the thinner side of the box and start cutting  from the edges vertically down. As you keep proceeding you will get a rectangle shape thick strip.

Do not stop , just keep cutting. 🙂

Once you reach the end of the box start cutting horizontally that is the bottom of the box and than start cutting vertically upwards the other side of the box. After cutting all the 3 side of the box continuously. Now what you have is a long rectangle strip. Right?

20140405_123925

Now the last step and the most easy and fun, we  just need to stick the rolls on that strip of cereal box and wow!! you got  you wall art. Make a small hole on the top of it and hang it to the wall with the help of nail.

IMG_20140405_141334


Enjoy DIYing… i will post few more post in future  about magazine rolls art so Stay Tuned and #StayCrafty


Lets catch the dream together … “Dream Catcher”

IMG_20140415_000343

Required Craft Supply

– Embroidery ring (Size of  your wish how big you want your Dream Catcher to be)
– Ribbons (color of your choice)
– Yarn
– Feathers
– Glue/Transparent tape

Procedure


Start with wrpping the outer/ bigger ring, glue one end of the ribbon on the outer ring and start wrapping it around the ring. Once done glue the end of the ribbon to the ring. You can choose the color of the ribbon as per your choice, i have wrapped it with 3 different color you can do that with one or more like me.

IMG_20140414_220926


-Wrap a yarn to smaller/inner ring so that it will look like a web. You can even wrap this on also with ribbon or you can paint it before wrapping with the yarn. I kept mine as it was, as i like the bit of rustic look in it. 
 Once the inner ring is wrapped it will look like this.

IMG_20140414_221626

We can go creative with the center as we can add colorful beads in them while wrapping the yarn, or you can use multicolored yarn to make it look more vibrant. Now start tying 4-5 strings of yarn on the lower side of the outer ring. Make sure you are tying the yarn at least 5 inches apart from each other.

Go creative, keep the length of yarn as per choice, i try to keep the length in V-shape that in the end the yarn will make a shape like alphabet V. Now glue or tape the feathers with the yarn, here also we can add the colorful beads with the feathers.

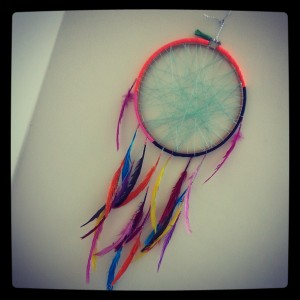
Once everything is attached, fix the smaller ring into the bigger one tighten it and the beautiful, colorful #DreamCatcher is ready.

IMG_20140415_000343